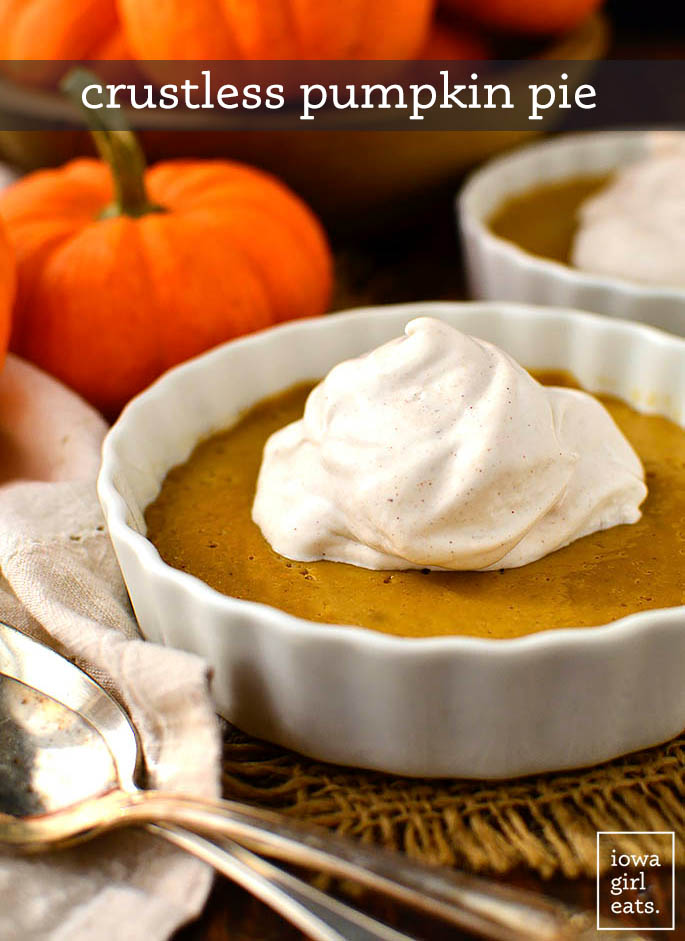
I don’t know about you, but my social media feeds are ALL pumpkin desserts right now. While October was all about pumpkin drinks, November has been pumpkin cheesecakes, pumpkin parfaits, and pumpkin pies, oh my! Well I’ve got another pumpkin dessert idea to add to the list – Crustless Pumpkin Pie: aka portion controlled, creamy pumpkin pie filling that’s not only gluten free, dairy free, and make ahead, but naturally sweetened too. These no crust pumpkin pies taste like a big ol’ slice of traditional pumpkin pie – minus the crust. They are perfection!
Watch How to Make Them!
Food Allergy Friendly + Lower Carb Dessert
My Dad makes a MEAN pumpkin pie for Thanksgiving every year and I have so missed having a slice or 7 after the big meal since being diagnosed with Celiac Disease. I am not kidding when I say that this rich, creamy, and heavily spiced pumpkin pie filling mixture tastes exactly like his — made a little healthier because it’s naturally sweetened with pure maple syrup and coconut sugar, plus we’re ditching the fat-laden crust. That said, if you’ve got a friend or family member who eats gluten free or dairy free, I promise they’ll love devouring an entire crustless pumpkin pie to themselves this Thanksgiving. Or, if you’re watching your carbs, these crustless cuties are definitely a lower carb swap for traditional pumpkin pie.
Ingredients Needed
I love that I always have all the ingredients needed to make Crustless Pumpkin Pie on hand. Raid the fridge and pantry for…
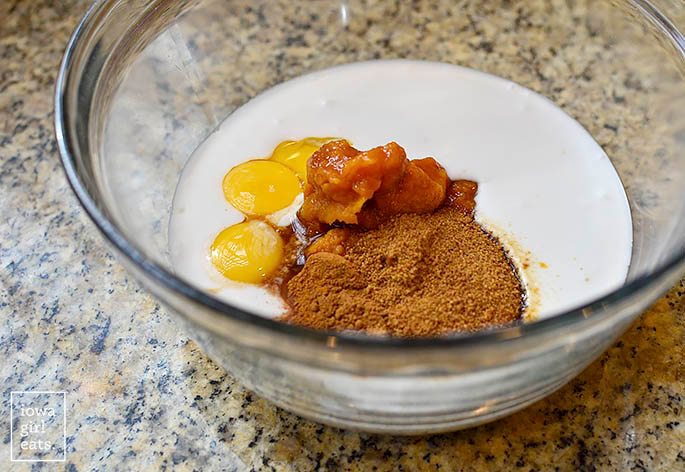
Full fat coconut milk. No evaporated milk needed for this crustless pumpkin pie. Coconut milk creates a smooth and rich dairy free filling – and I promise the pies do not taste like coconut. 100% pure pumpkin puree. I prefer Libby’s canned pure pumpkin puree for this recipe. I’ve found some organic and/or store brand pumpkin purees to be gritty, while Libby’s is always very smooth. Egg yolks. Egg yolks help the filling set up and add richness to the dessert. Pure maple syrup + Coconut sugar. Be sure you’re using pure maple syrup vs pancake syrup – the flavor difference is night and day. If you don’t have coconut sugar on hand, you can substitute brown sugar in its place. I have not tested this recipe with sugar substitutes. Vanilla, Cinnamon, Pumpkin Pie Spice: these flavorings and spices provide the classic pumpkin pie flavor experience even though we’re ditching the crust.
Recipe Notes
Can you make Crustless Pumpkin Pie ahead of time? Yes! Prepare, bake, then cool the pies completely before wrapping in plastic wrap and refrigerating 1-3 days prior to serving. Can Crustless Pumpkin Pie be frozen? Absolutely! Prepare, bake, then cool the pies completely, and then wrap in plastic wrap and refrigerate until thoroughly chilled. Wrap the dish in foil then freeze for up to three months. Let thaw in the refrigerator for 24 hours prior to serving.
How to Make Crustless Pumpkin Pie
Step 1: Make the Pumpkin Pie Filling
Start by adding canned coconut milk to a large bowl with canned pumpkin puree, egg yolks, pure maple syrup, coconut sugar, vanilla, cinnamon, and pumpkin pie spice. Whisk until smooth then strain the mixture through a fine mesh sieve into a bowl with a lip. This is an important step to achieve a super smooth pumpkin pie filling so try not to skip.
Step 2: Bake in a Water Bath
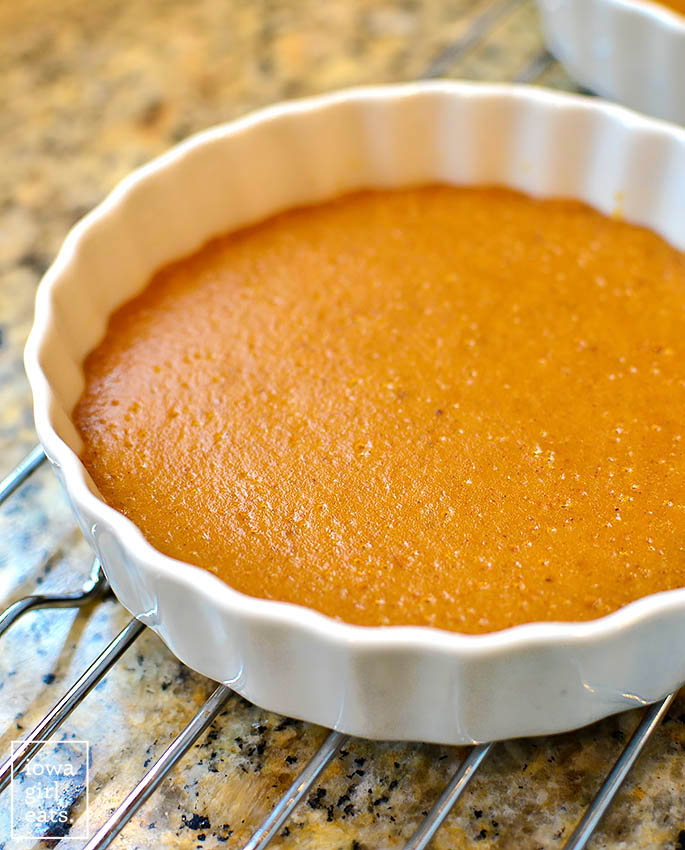
To avoid ugly cracks, uneven baking, and a skin forming on top of the crustless pumpkin pies, we need to bake them in a water bath. So, pour the pumpkin filling mixture into 4oz or 5oz ramekins (either size works) that have been lightly sprayed with nonstick spray then place the ramekins inside a large baking dish. Heat 4 cups water in a saucepan or in the microwave until simmering then place the baking dish with the ramekins inside on your oven rack. Carefully pour the hot water into the baking dish until it comes halfway up the sides of the ramekins, then gently slide the oven rack all the way into the oven being careful not to slosh any water into the pies.
Bake for 35-40 minutes, or until the centers of the pies are set, then carefully pull the baking dish out of the oven and let the pies sit in the water bath for 15 minutes before removing and cooling on a baking rack for an additional 20 minutes. Cover tightly with saran wrap then refrigerate until you’re ready to eat.
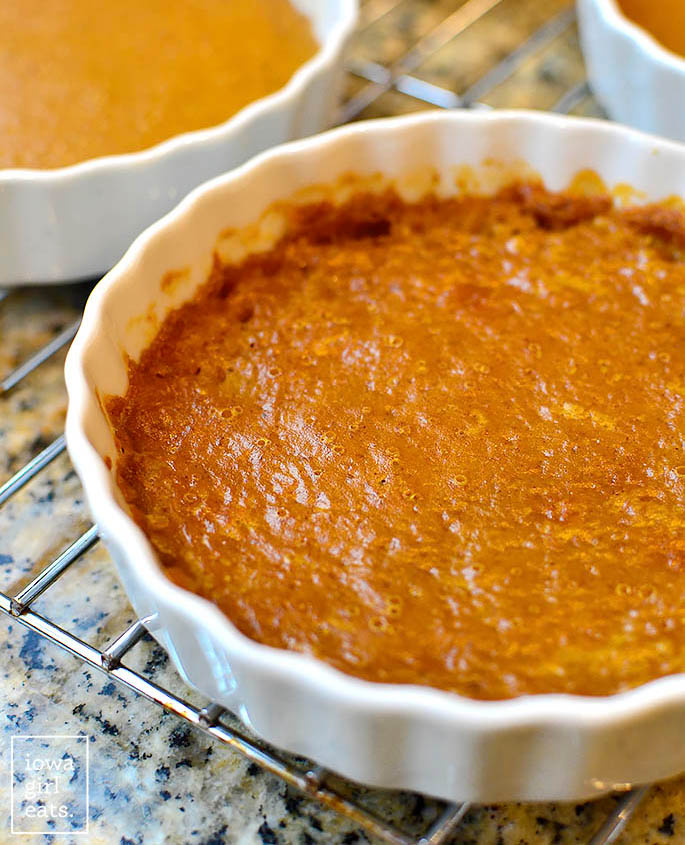
Here’s Why We Use a Water Bath!
This is why we bake the pies in a water bath! I baked one of the ramekins straight on the oven rack to show you the difference, as seen below. Not only is the non-water bath pie totally uneven but a skin formed on top too. Gag! Take the extra 2 minutes to create a water bath – you won’t regret it.
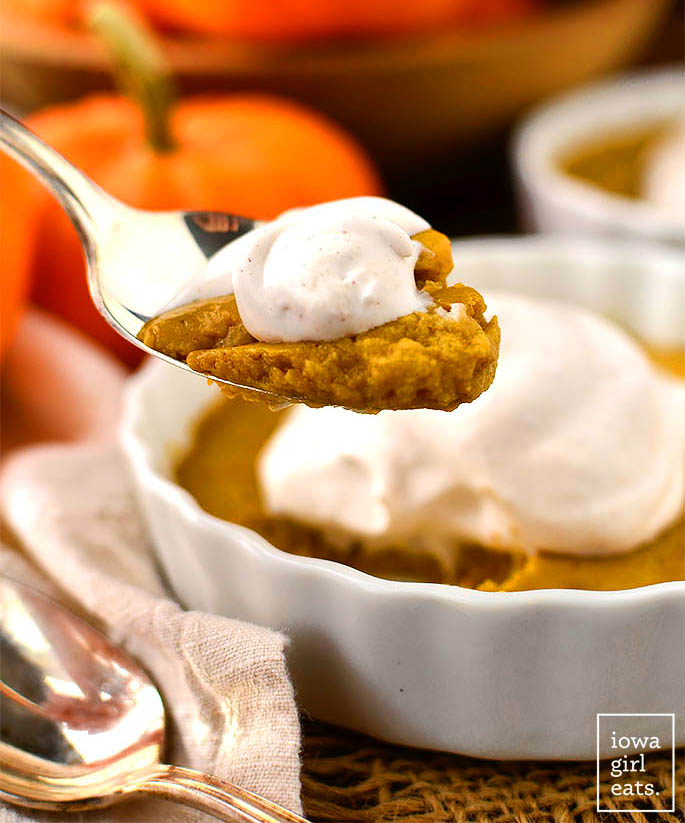
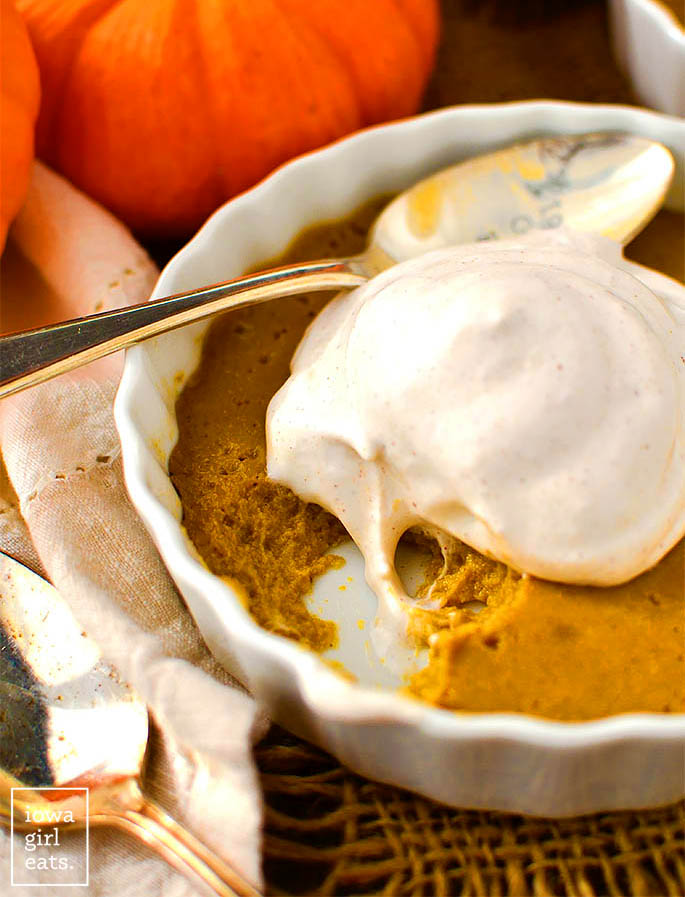
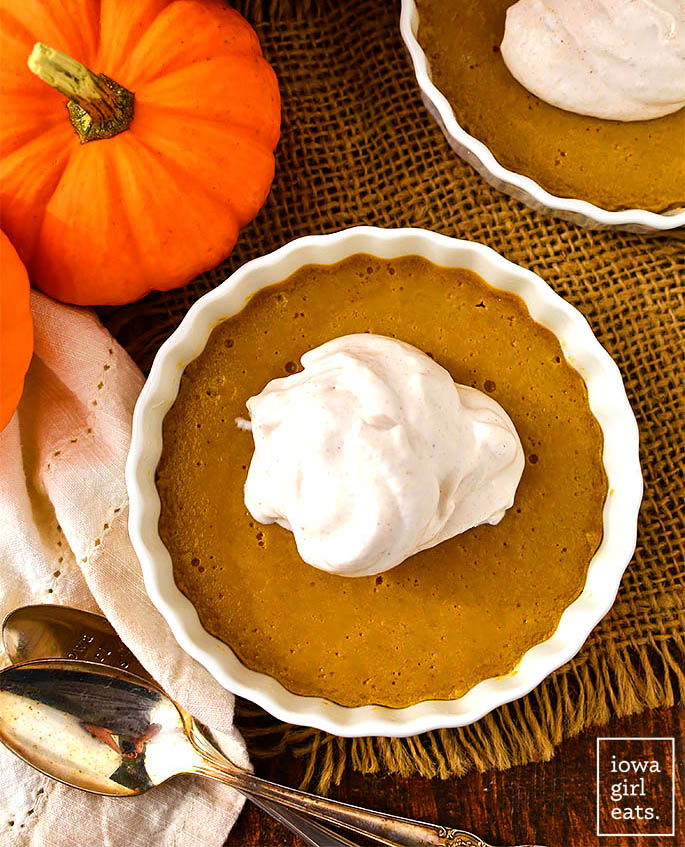
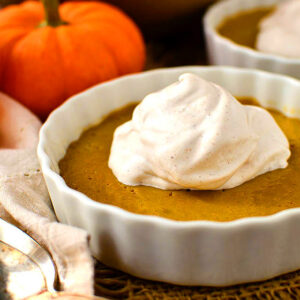
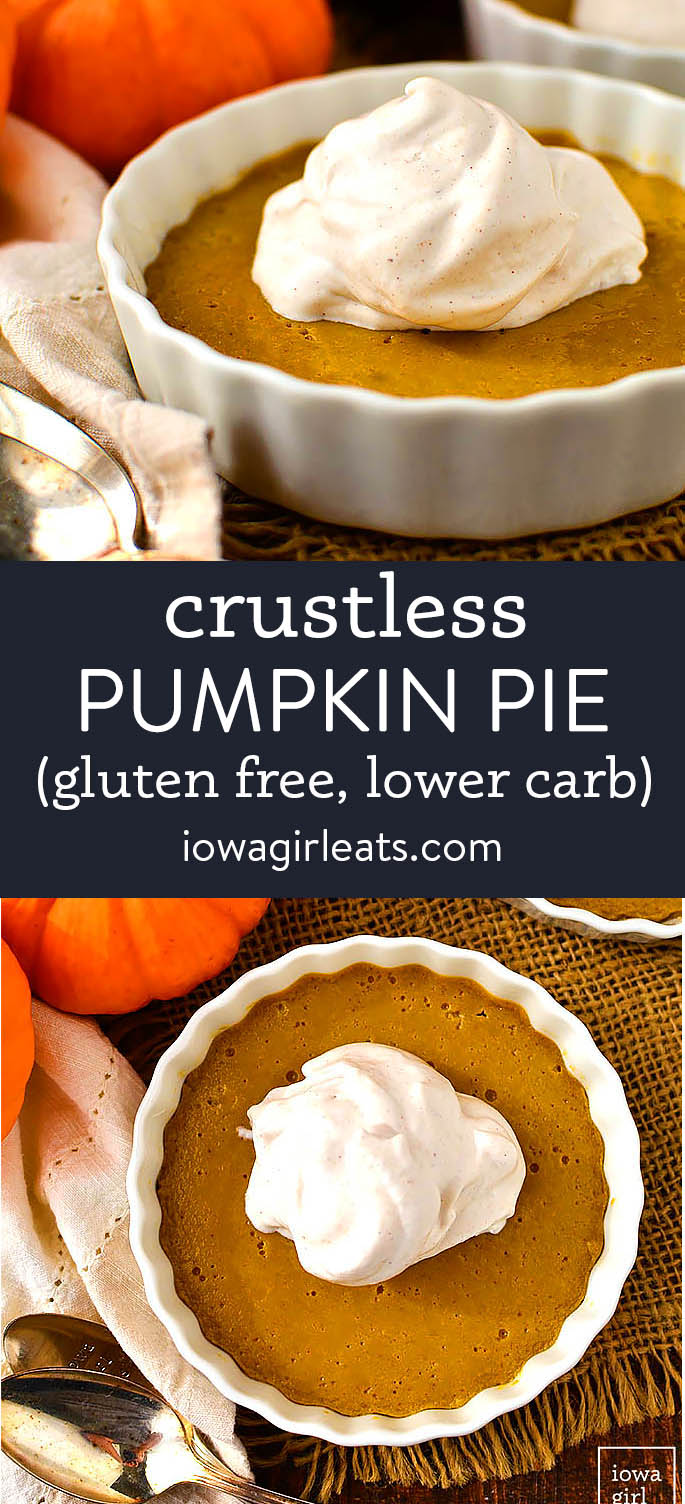
When you’re ready to devour, dollop the Mini Crustless Pumpkin Pies with LOTS of whipped cream. There’s absolutely nothing like homemade whipped cream but I went the easy route by using SoDelicious CoCoWhip whisked with a dash of cinnamon to keep the pies diary free. SO SO GOOD!! I hope you love these crustless, gluten free pumpkin pies this holiday season – enjoy!
More Dreamy Pumpkin Desserts
Gluten Free Pumpkin Cupcakes with Cream Cheese Frosting Gluten Free Pumpkin Bread Soft Batch Pumpkin Gingersnap Chocolate Chip Cookies Pumpkin Spice Chocolate Covered Pretzels Homemade Pumpkin Spice Latte
Like this recipe? Share it with friends!