One of my husband’s love languages is smoking meat, and I can’t deny that a rack of ribs smoked low and slow over hickory wood chips is a total treat. Since most people don’t own a smoker though, I’m sharing my recipe for oven-baked ribs that is BEYOND delicious and easy. Yes, you can get lip-smackin’, finger-lickin’-good ribs that fall off the bone from your oven. Every time I make these I’m stunned over how delicious they are. They come out perfect every single time!
Watch How to Make Them
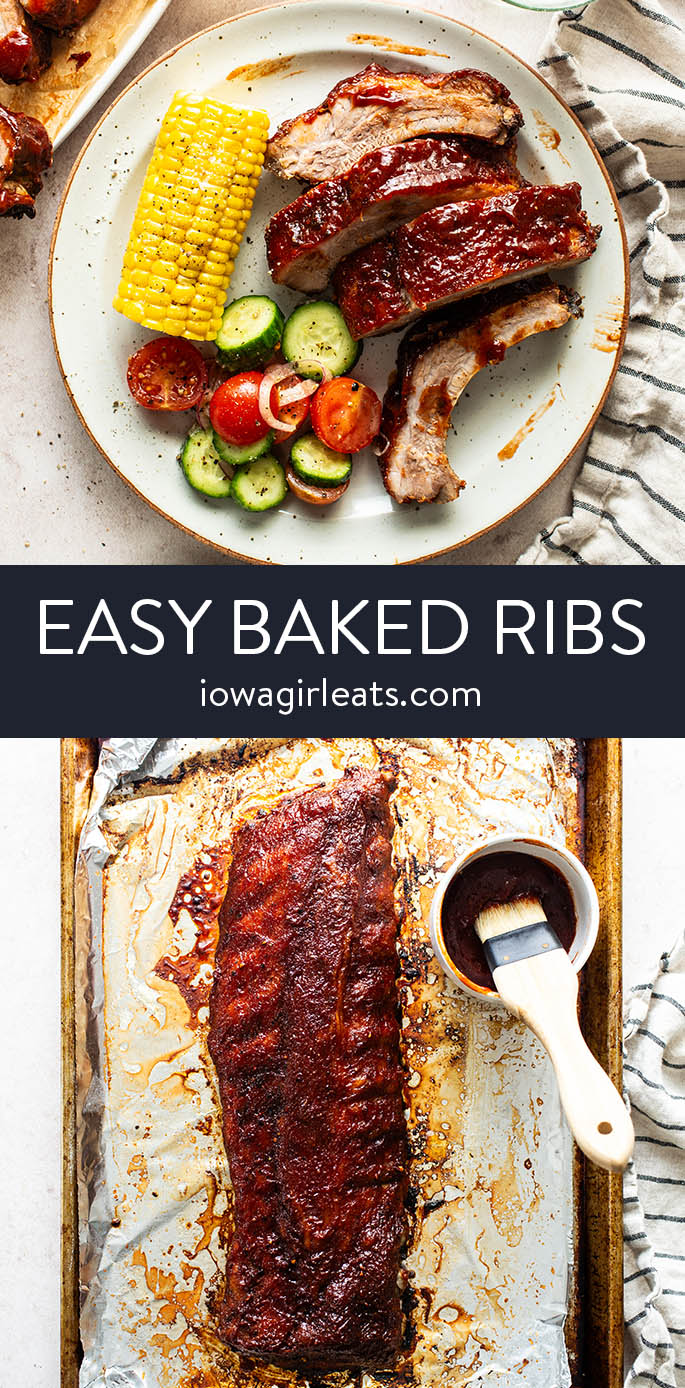
Ribs in the Oven
I place Easy Baked Ribs in the same category as slow cooker recipes because they’re completely prep-ahead then bake low and slow in the oven so I’m free to do just about anything else. They’re a hit for busy sports nights when the kids come home starving, or have activities at different times and need to stagger dinner, as the ribs are good hot or warm. Seasoned with everyday spices, baked for hours, then slathered with BBQ sauce — these oven ribs are succulent, fall apart-tender, and truly the easiest rib recipe you’ll ever make.
4 Main Types of Ribs
To be clear, this method for baking ribs in the oven is for pork ribs, not beef ribs. When you go to the grocery store there are several types of pork ribs to choose from and it can feel confusing, for sure! That said, please take your seat for Pork Rib 101 where I’ll review the 4 main types of ribs you’ll find at the store.
How to Choose Good Baby Back Ribs
Whether you’re baking, grilling or smoking them — here are two main considerations to keep in mind when choosing a rack of back ribs at the store:
Meat on top: look for baby back ribs with a good amount of meat on top of the ribs because back ribs don’t have a ton of meat between each rib bone. Fat: look for a rack of ribs with a good amount of fat. Pork fat = FLAVOR! You can trim any larger pieces off, but fat gives ribs their mouthwatering flavor and texture.
In general, a 2-1/2 — 3lb rack of baby back ribs will feed 2-3 people so I bake two racks of ribs to comfortably feed by family of 5. I think making ribs at home is something a lot of people find intimidating but honestly it couldn’t be simpler — I’ll show you how!
How to Bake Ribs in the Oven
Step 1: Trim the ribs.
Start with a 2-1/2 — 3lb rack of baby back ribs. Again, look for ribs with a lot of meat on top of the bones AND a good amount of fat. If there are large pieces of fat on top, feel free to trim them away. Blot the ribs all over with paper towels to dry them completely.
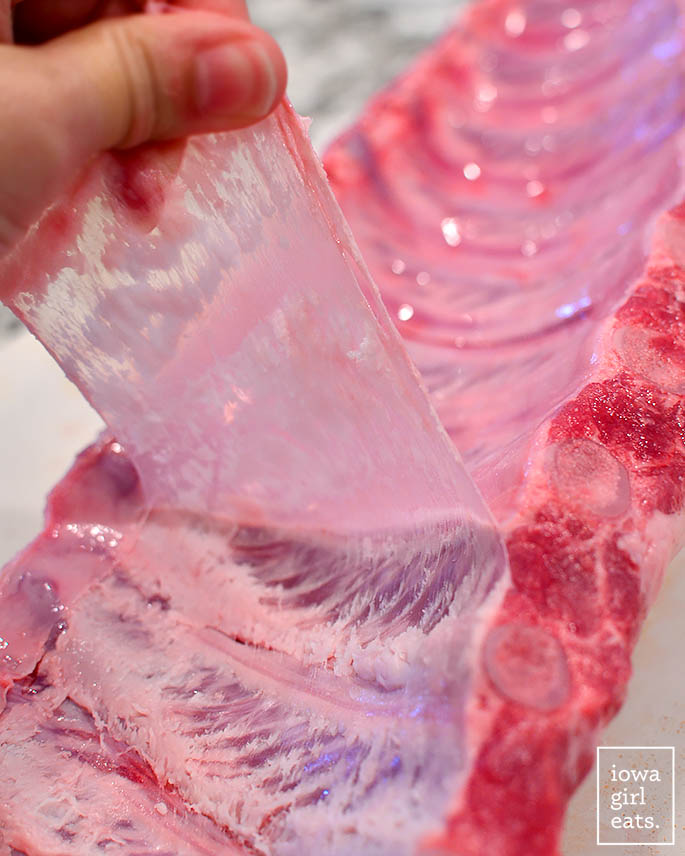
Step 2: Peel away the silver skin.
On the back of the ribs is a connective tissue layer called silver skin. The tissue is hard to bite through and needs to be removed before cooking the ribs no matter the method. Sometimes it’s already been removed by the processor but sometimes it hasn’t. Silver skin has a purply-white color (silver, I guess, lol) and is not hard to remove. If present, stick a pairing knife underneath the silver skin between two rib bones near one end of the rib rack then use a paper towel, if necessary, to get a good grip and peel it away from the length of the ribs. All easy from here on out!
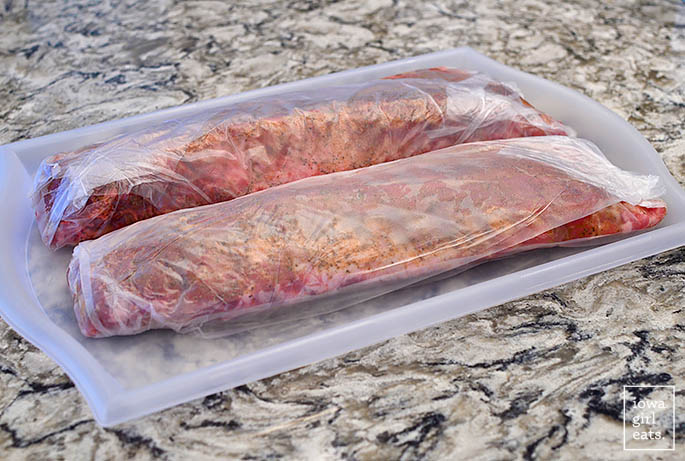
Step 3: Season the ribs.
Next, stir together a homemade seasoning mix of salt, pepper, garlic powder, onion powder, cumin, smoked paprika, and a little cayenne pepper (optional) in a small bowl. Sprinkle the mixture on both sides of the ribs then rub to coat with your fingers. Wrap the ribs in plastic wrap then refrigerate for 2 hours or up to 24 hours. You can place the ribs on the baking sheet we’ll use to bake them on, or on a tray — it doesn’t matter.
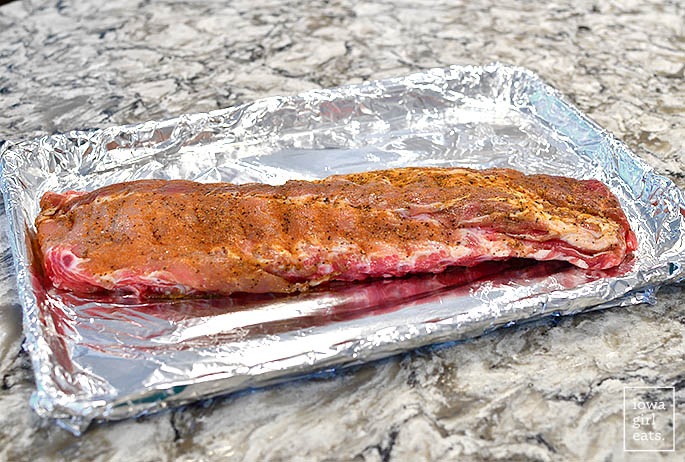
Step 4: Cover then bake.
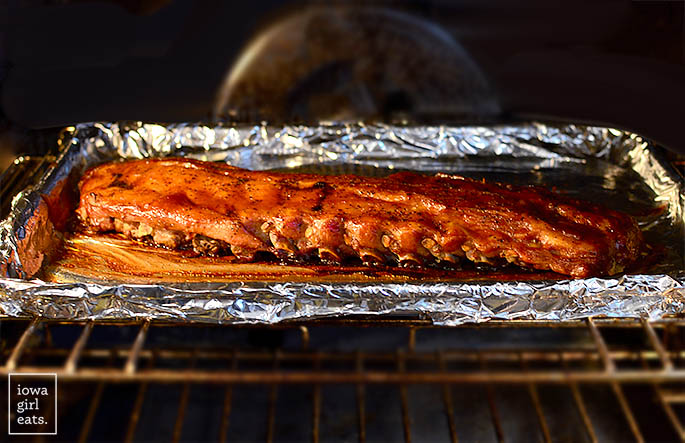
When it’s time to bake, unwrap the ribs then place them on a foil-lined, nonstick-sprayed baking sheet. If baking more than one rack, give them each their own baking sheet. Cover the baking sheet tightly with foil then bake for 3-1/2 hours at 250 degrees. If your rack of ribs is larger than 3lbs, add an additional 30 minutes baking time per additional 1/2 — 1lb ribs. For example, bake a 3 — 4lb rack of ribs for 4 hours.
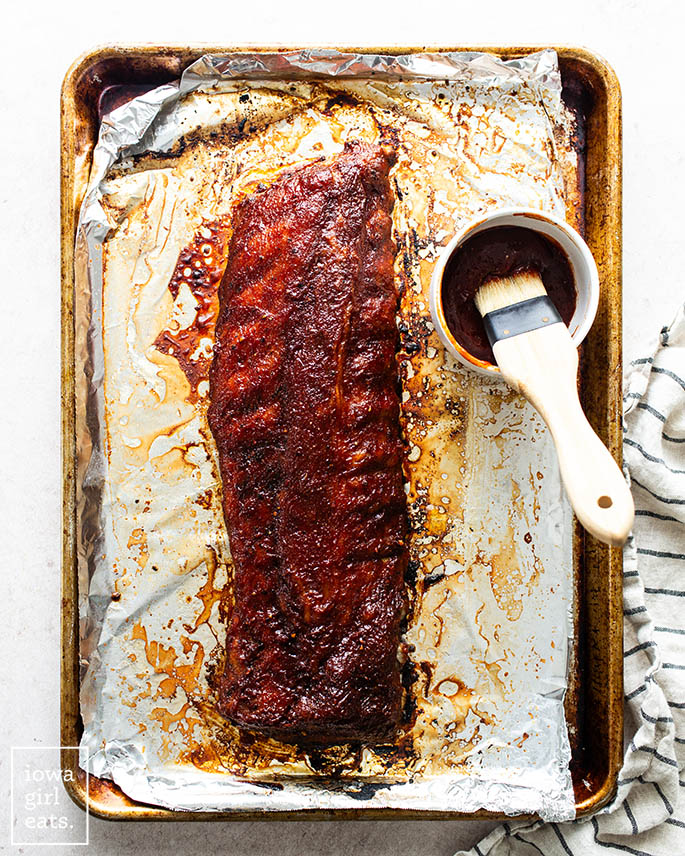
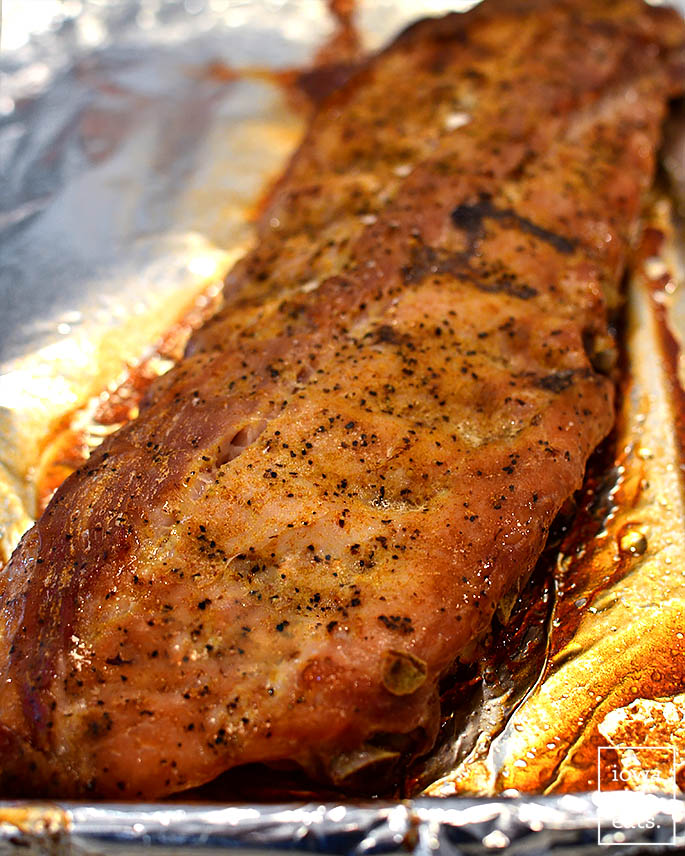
Carefully remove the foil on top of the baking pan then drain off any excess liquid that might be present.
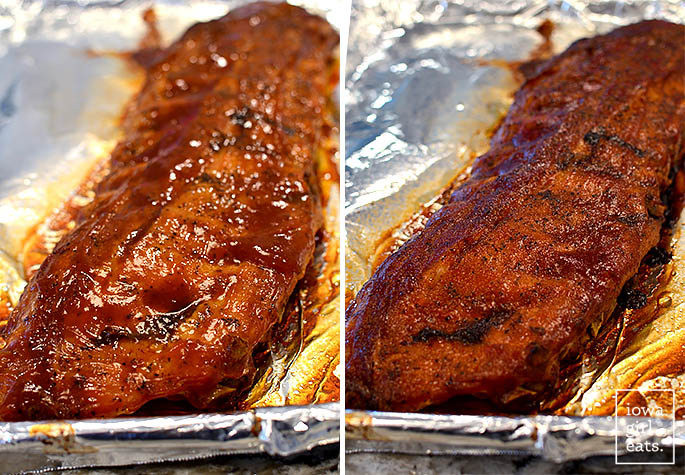
Step 5: Slather with BBQ sauce.
Slather the tops of the ribs with your favorite BBQ sauce then bake for an additional 30 minutes to get a caramelized, lacquered top. Personally I like to go with a sweeter BBQ sauce like Stubb’s Sticky Sweet BBQ Sauce.
The scent wafting from the oven is unlike anything else!
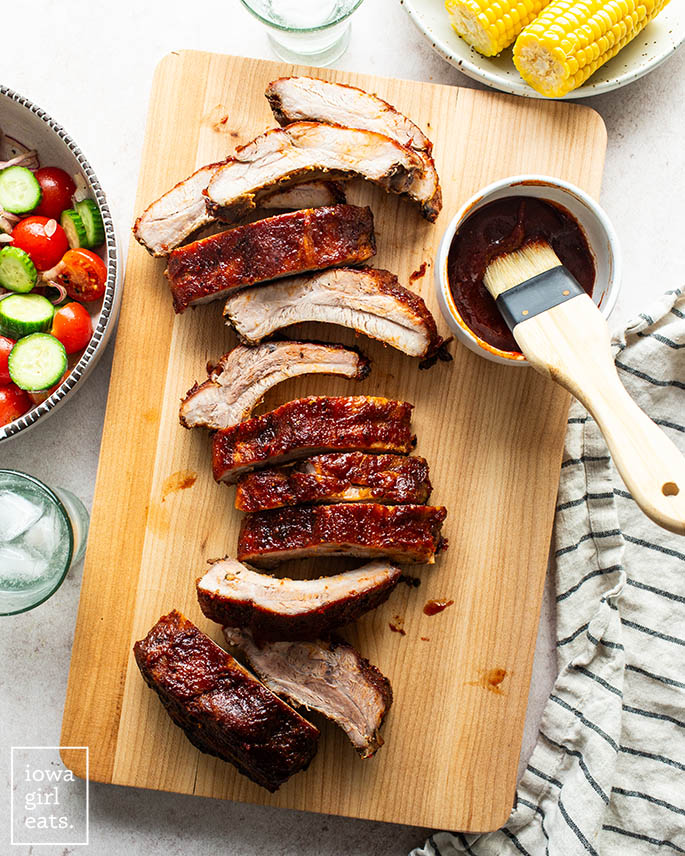
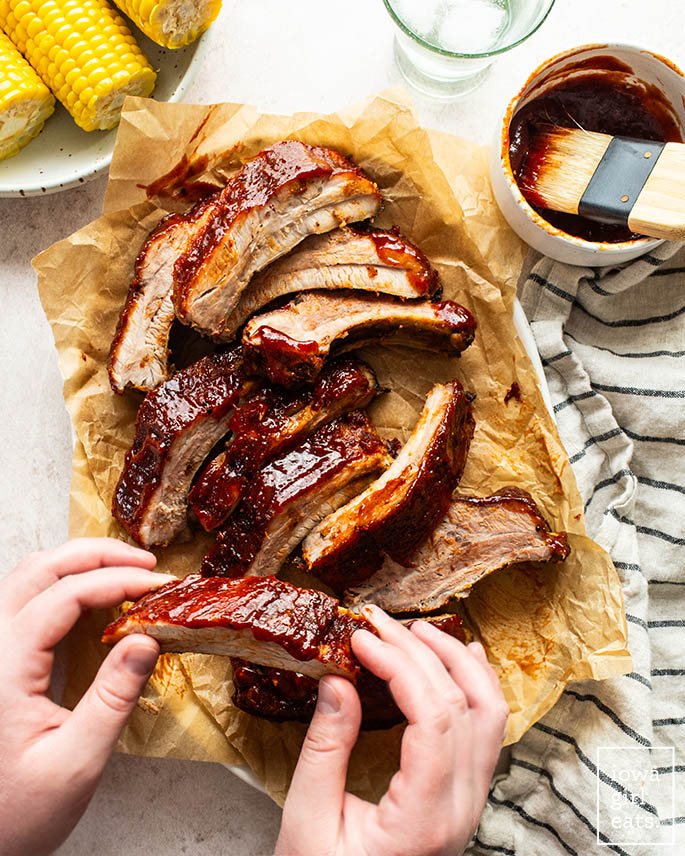
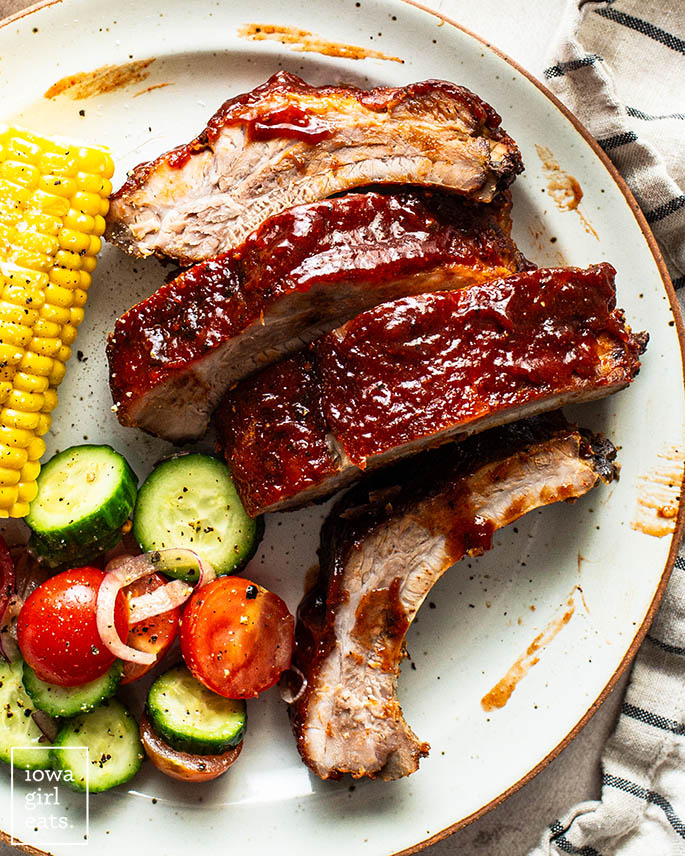
Step 6: Rest, Slice, then Serve
Let the ribs rest for 15 minutes or so before slicing and serving. I’m telling you — the meat completely falls off the bone. So tasty and tender! Whether you’re serving ribs at a summer cookout, the middle of winter, or anytime in between, I hope you love every last drop of these tender and truly delicious oven baked ribs — enjoy!
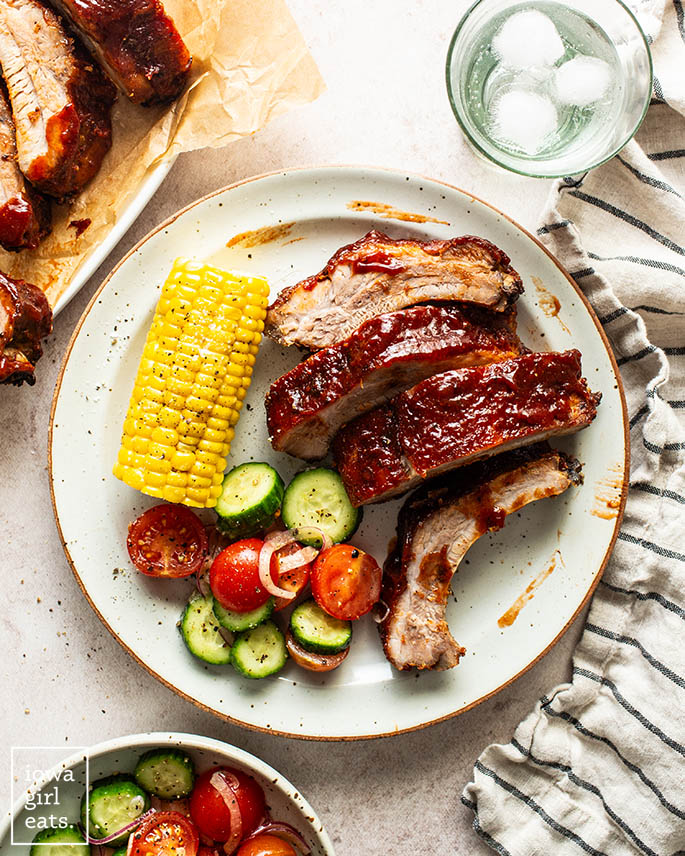
Serve these recipes with your ribs!
Gluten Free Cornbread The BEST Pasta Salad Marinated Vegetable Salad The Best Baked Beans EVER Cucumber-Tomato Salad Napa Sweet Corn Salad Classic Potato Salad
Photos by Ashley McLaughlin Like this recipe? Share it with friends!